
Introduction:
This is an article by IanW on various aspects of saw design, thoroughly enjoyable reading, and sure to provoke some discussion on hang angles canted blades and tooth profiles, and some examples of the beautiful saws Ian has made over the last few months. Many thanks to IanW for submitting this article, I hope he makes some more of those "Kenyon inspired" dovetail saws, very nice. ..Ray
Handles & teeth on small Backsaws
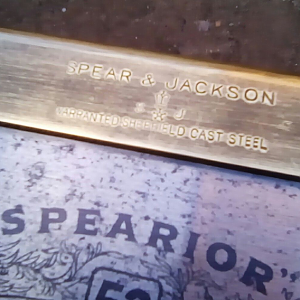
This is not a ‘how to’ on saw making; that has been well covered by others with way more experience than I have, but I would like to draw attention to a couple of points that, if they are mentioned at all by saw makers, it’s usually very briefly covered, as if anyone keen enough to tackle saw making would know already. I certainly don’t claim any great wisdom, and wish to provoke some discussion rather than lay down any laws. The topics I’m referring to are, angle of the grip (with respect to the line of the teeth) and choosing tooth pitch & profile. It’s interesting to see those old adverts from 100 years ago when saws of every conceivable size could be supplied with any number of teeth per inch the buyer desired. At first that seemed a bit odd to me, I thought there should be well-established rules for what is “best”, given the number of skilled people wielding them on a daily basis. However, that is precisely why, I think, there were no simple rules. When you consider that saws were used by people of different skill levels, for many different purposes, in many different woods, it’s hardly surprising that practiced hands would find what suited them best & want tools that delivered their needs.
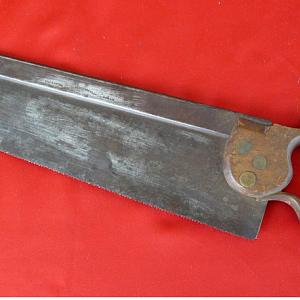
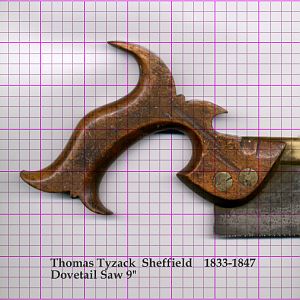
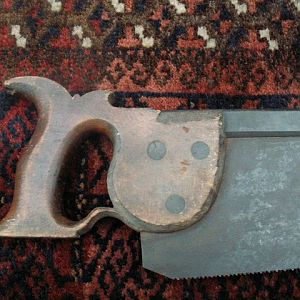
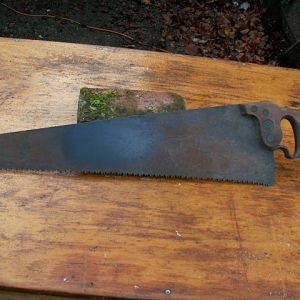
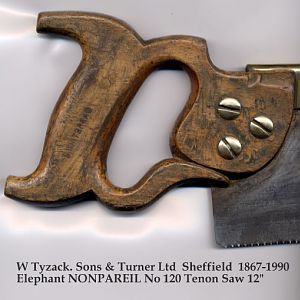
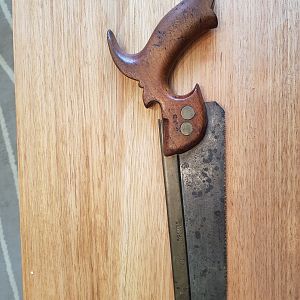
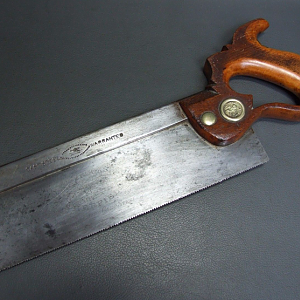
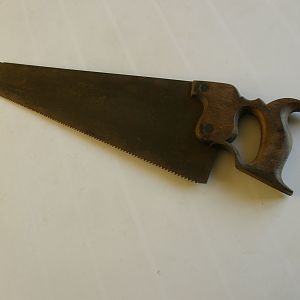
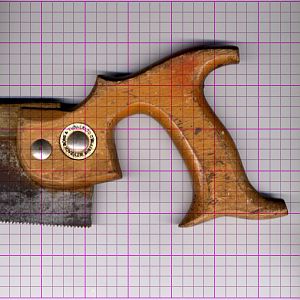
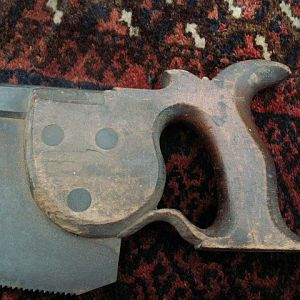
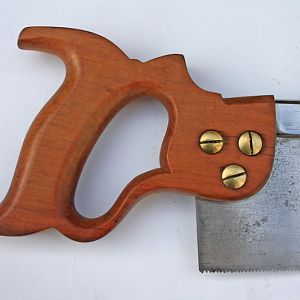
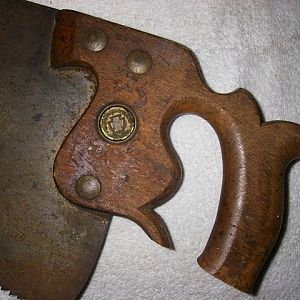
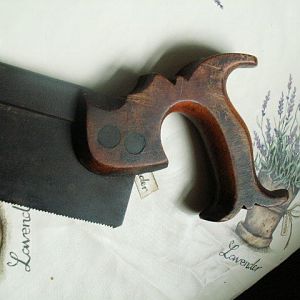
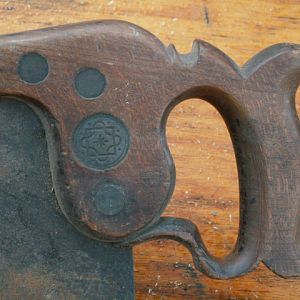
I’ll start with grip angles, because that’s the simpler topic & I think I have figured that one out to my own satisfaction. A long time ago, I remade the handle for a new 8” brass-backed Tyzack saw. The thing that came with it was hardly worth the dignity of the name ‘handle’ – it was crude, ugly & uncomfortable to hold. My replacement was a copy of one I saw on an old saw belonging to someone else. I gave it no more thought at the time other than I liked the look of it & it seemed comfortable in my fist. That little saw had very fine teeth & I used it for general crosscutting of small pieces, but after reading an article in FWW, I had it recut to a 15tpi rip pattern for dovetailing. I was amazed at the change in character of that saw – it went from a so-so tool to a very accurate and useable instrument. My clumsy efforts at sharpening meant the saw varied a lot in its cutting action, but gradually, I learnt how to keep a proper profile on the teeth, and just as importantly use a very fine set. Even though I subsequently acquired several small backsaws, I always reached for this one to cut dovetails, even when its state of sharpness was a bit dodgy, and it’s only recently that I realised why. It’s because the grip angle is just right for holding the saw comfortably for this process. Intuitively, I arrange the position of the piece to be cut at a height above the bench so that my forearm is more or less parallel to the bench. In this position, the saw sits easily, with my wrist at a comfortable & natural angle, which allows me to start a cut at the correct angle to follow a line perfectly from start to finish. This is important because the minimal set on this saw means it can’t be ‘steered’, you have to begin straight & remain straight for the rest of the cut.

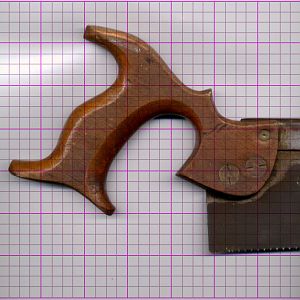
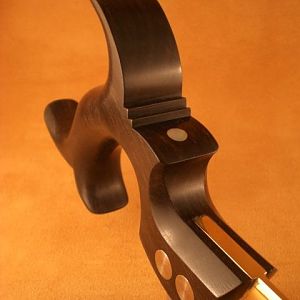
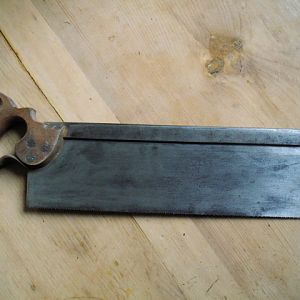
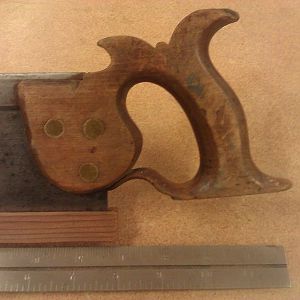
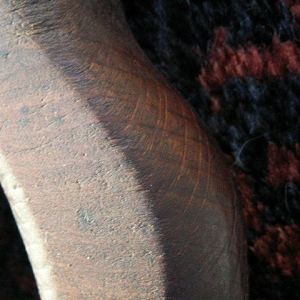
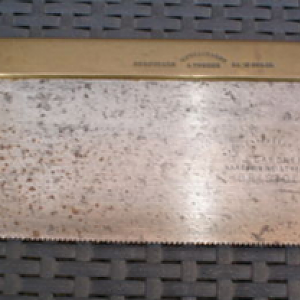
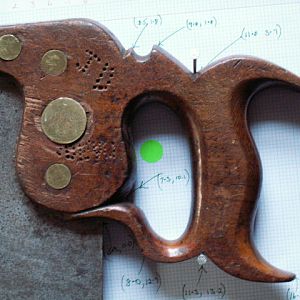
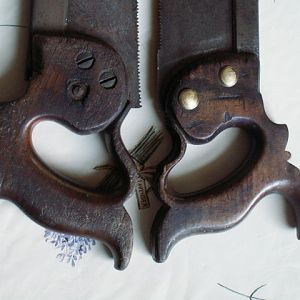
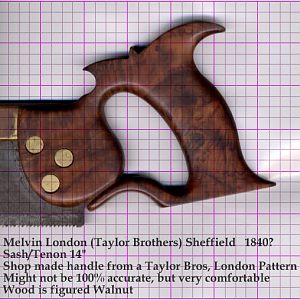
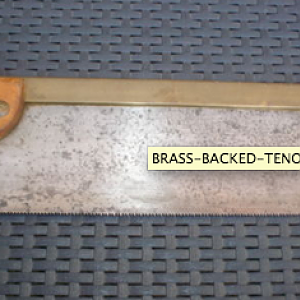
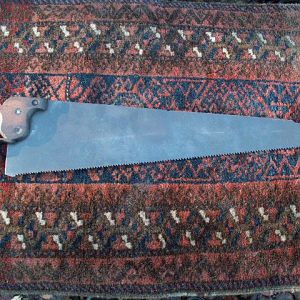
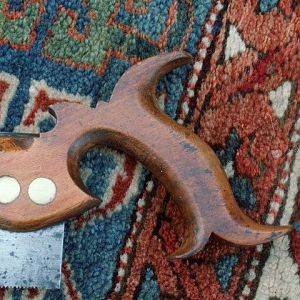
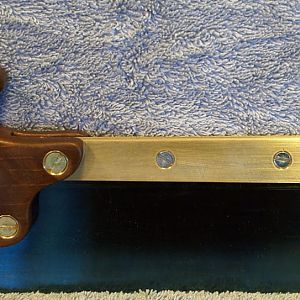
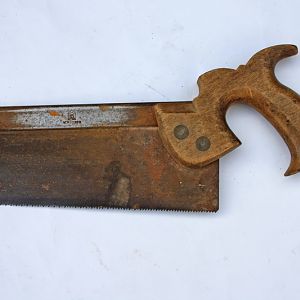
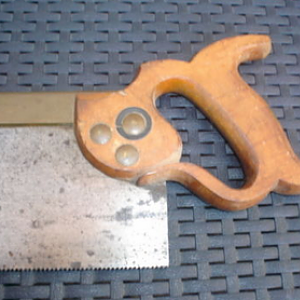
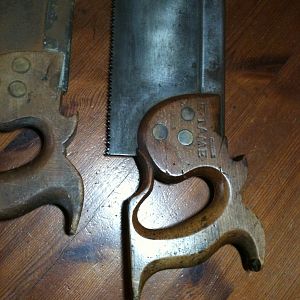
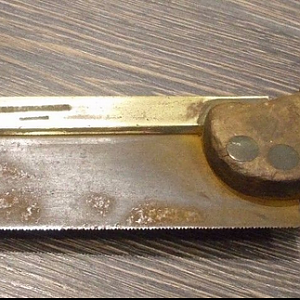
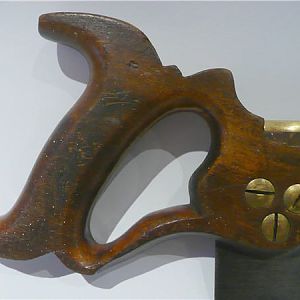
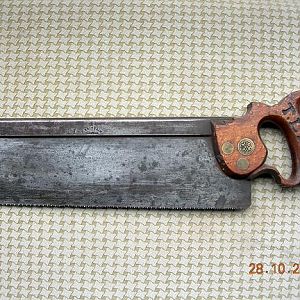
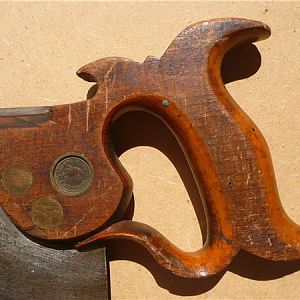
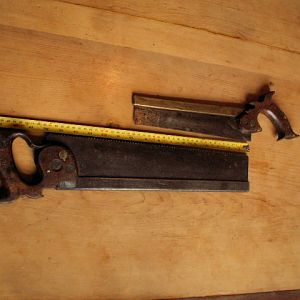
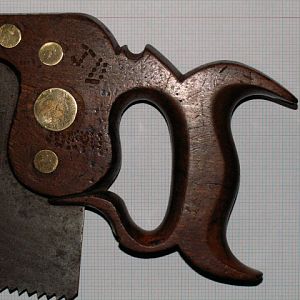
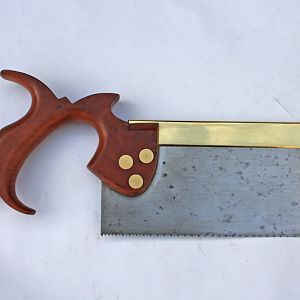
Fig. 1. On the left is the rehandled Tyzack held with my forearm parallel to the bench. With wrist in a comfortable position, the tooth line is more or less square to the bench top. The angle between tooth line & the centre line of the grip is about 65 degrees.
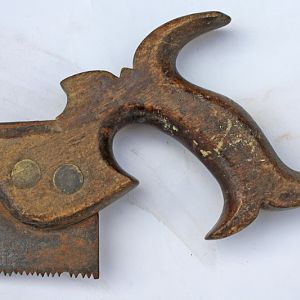
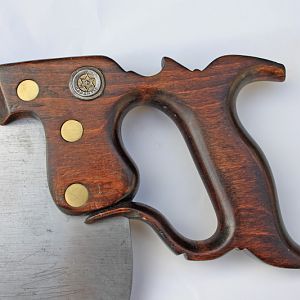
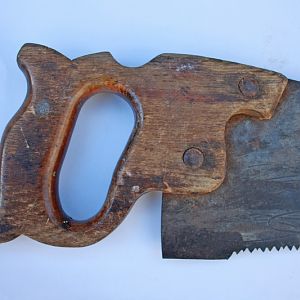
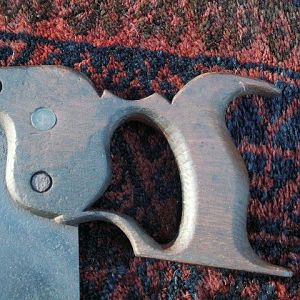
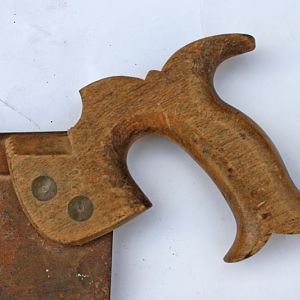
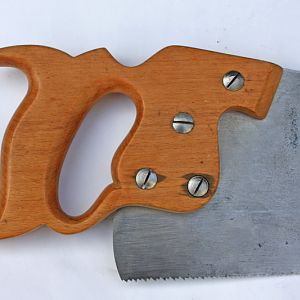
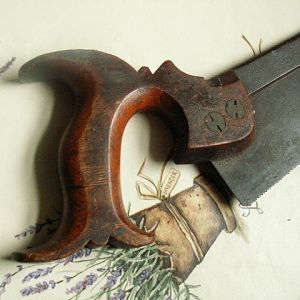
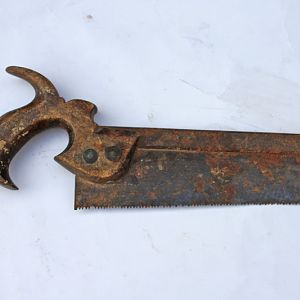
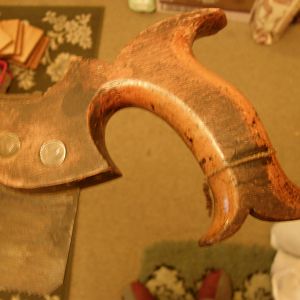
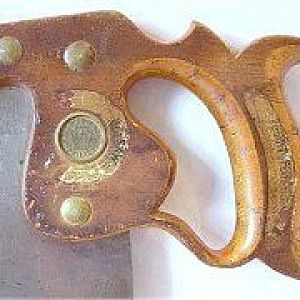
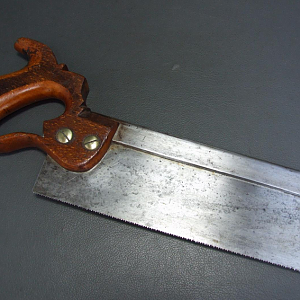
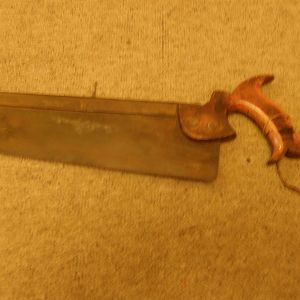
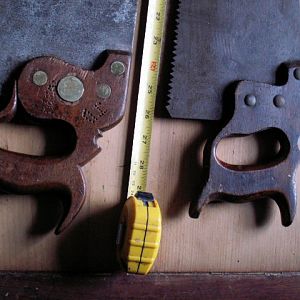
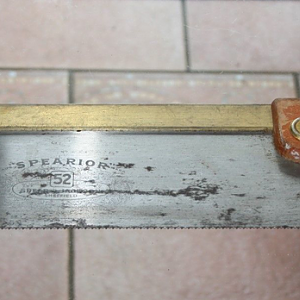
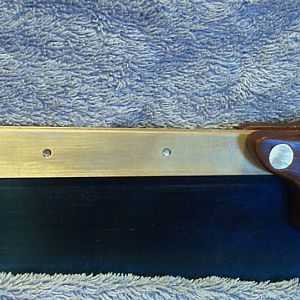
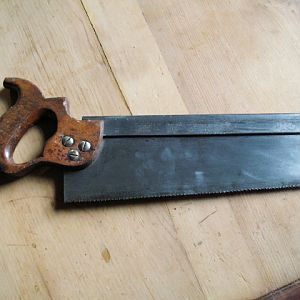
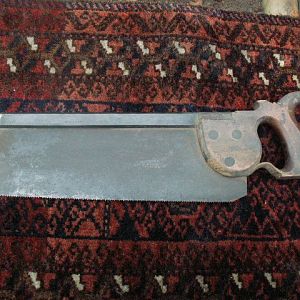
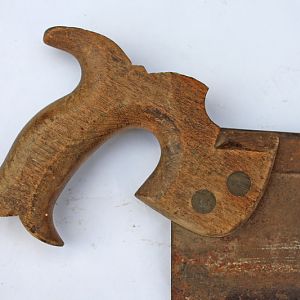
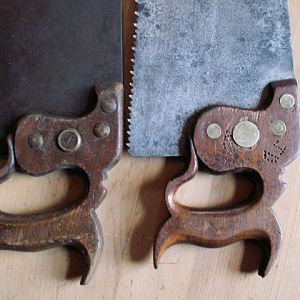
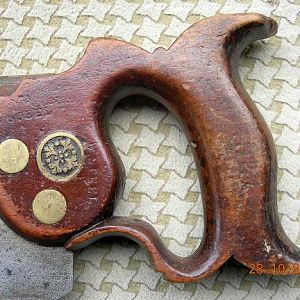
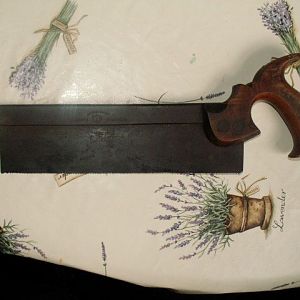
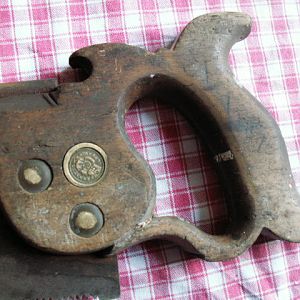
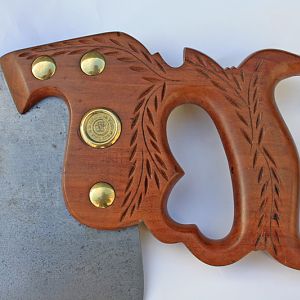
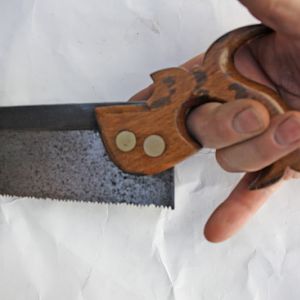
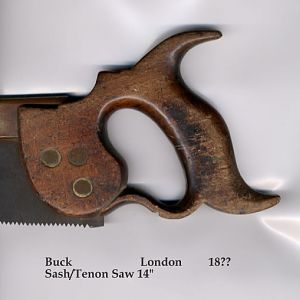
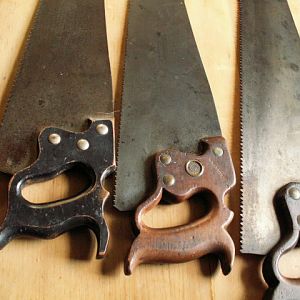
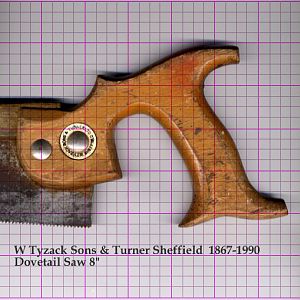
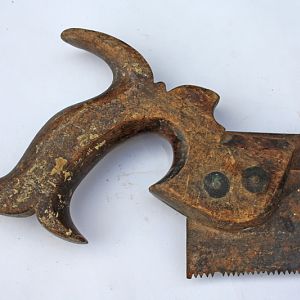
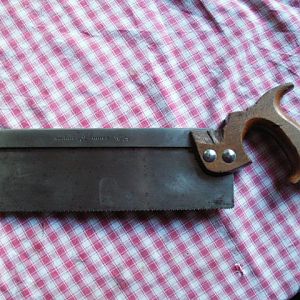
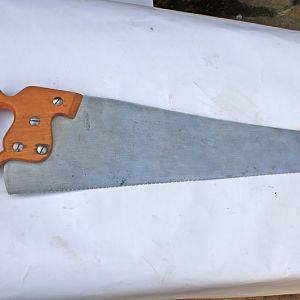
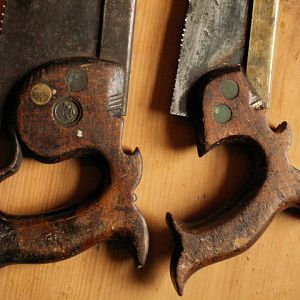
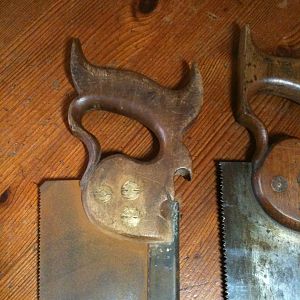
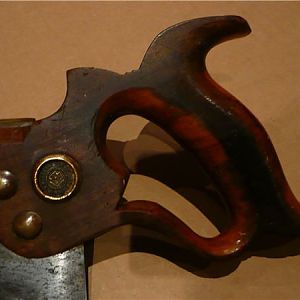
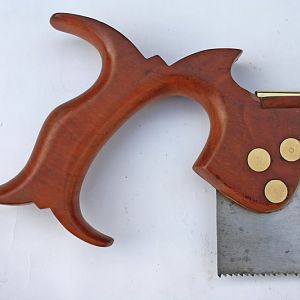
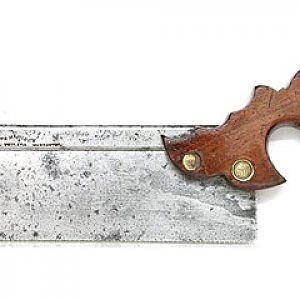
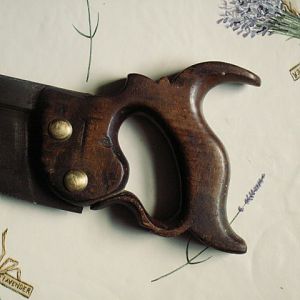
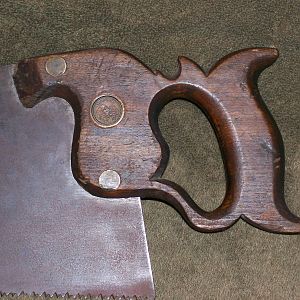
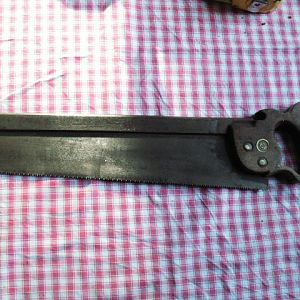
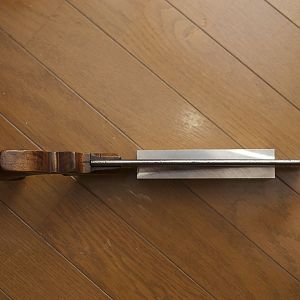
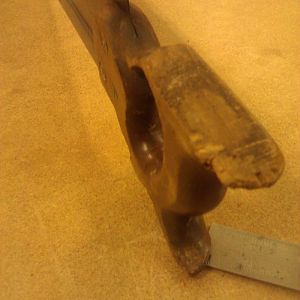
The next saw I modified was a cheap 18tpi backsaw bought new for the princely sum of $5 (though that would be more like $30 now). This was a surprisingly good little saw, but its thin steel back gave it little heft, and the red-painted knife handle was hardly a work of art. I saw a picture of Duncan Phyfe’s tool chest one day, & noticed these attractive pistol-grip handles on his small saws, so on a whim, I made a new handle from a scrap of figured walnut & stuck it on. I paid little attention to the angle of the grip – just made the handle to look like what I’d seen, & stuck it on (this was also when I discovered how difficult it is to drill saw plate with an ordinary drill bit). I failed to appreciate that the butt of the grip would hang down about 20mm below the line of the teeth until it was too late. It meant the saw was a bit awkward to use on a bench hook, but for nipping off corners of tails & small tenons held in a vise, it was fine, & has seen lots of use.
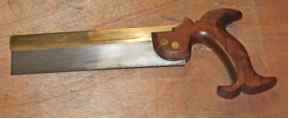
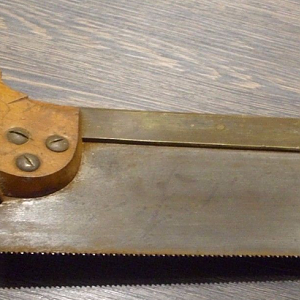
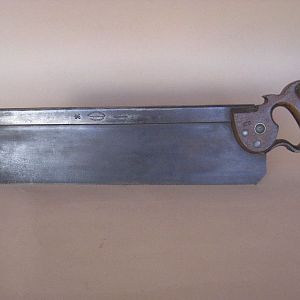
Fig. 2. The modified 18tpi saw with added brass back and pistol grip handle – note how the grip extends well below the tooth line.
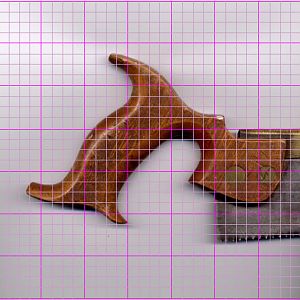
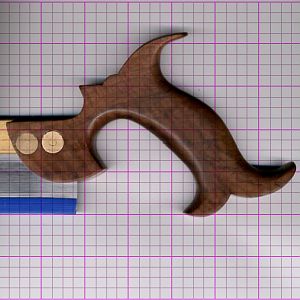
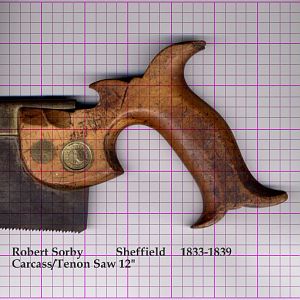
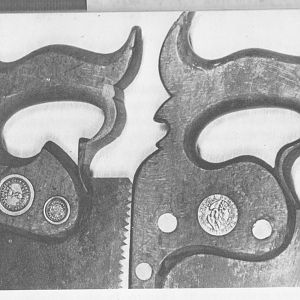
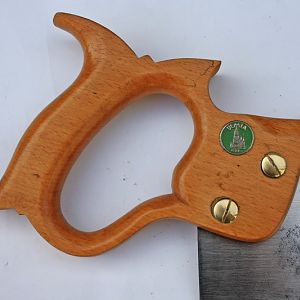
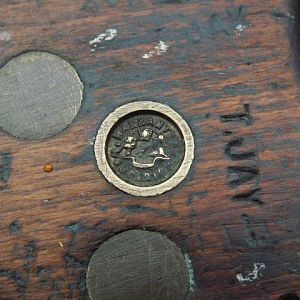
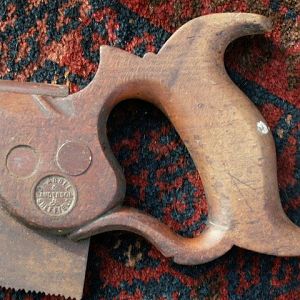
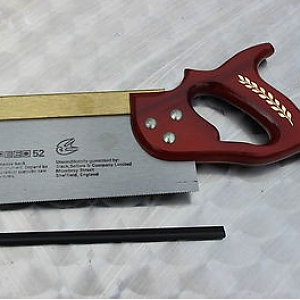
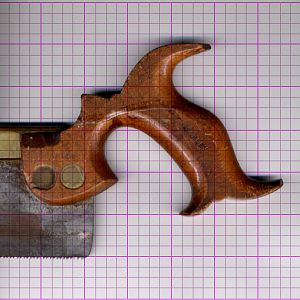
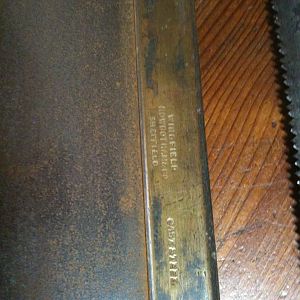
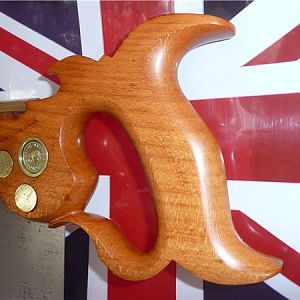
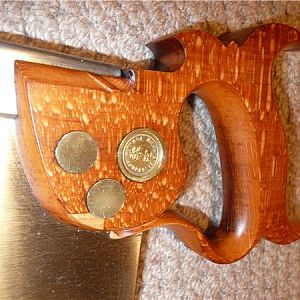
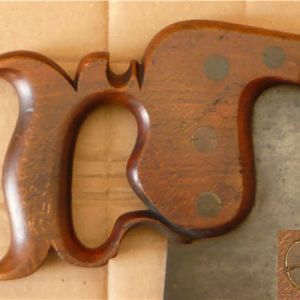
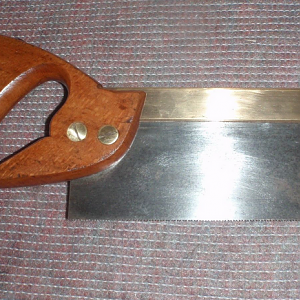
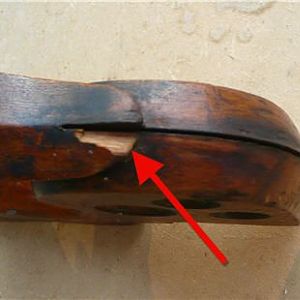
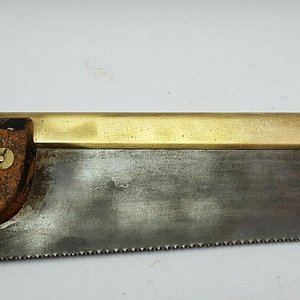
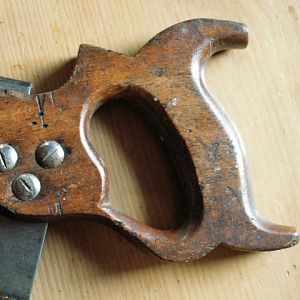
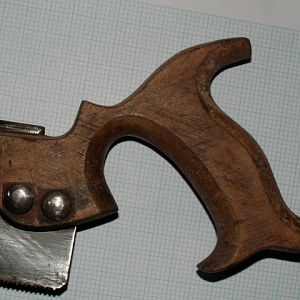
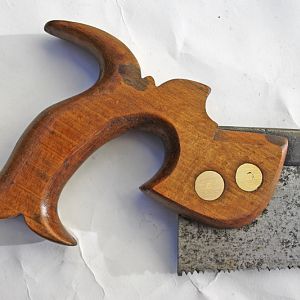
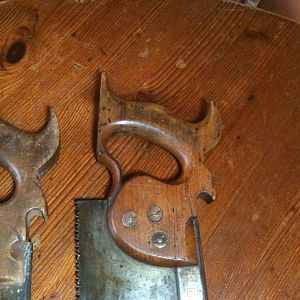
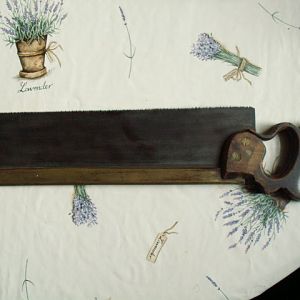
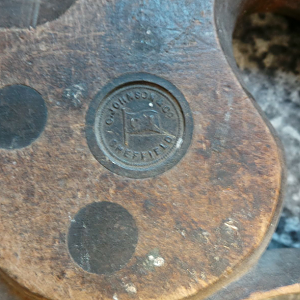
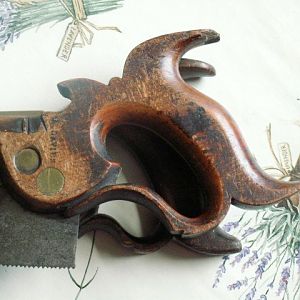
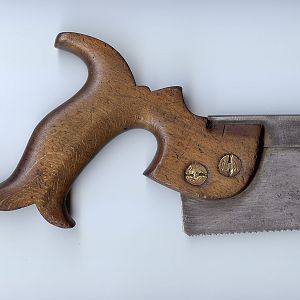
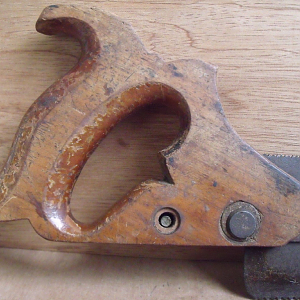
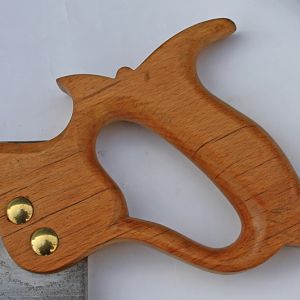
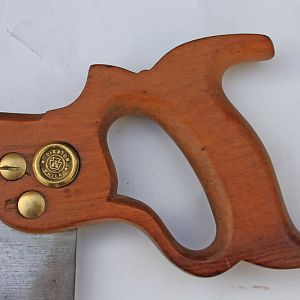
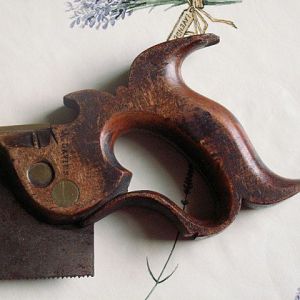
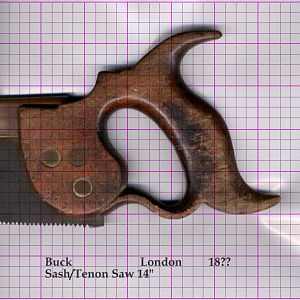
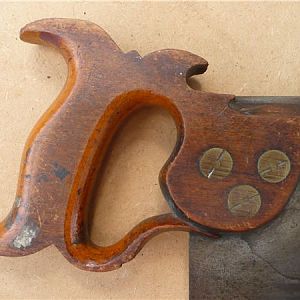
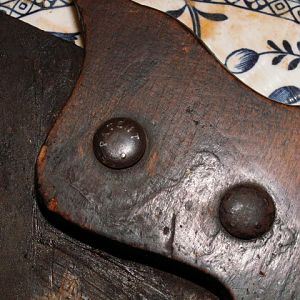
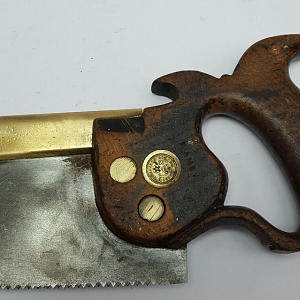
The next raising of my awareness of grip angles came when I rehandled another old clunker. This was my closest approach so far to saw making – I also fitted a new brass back at the same time. I used a handle template I got from somewhere on the web – can’t remember where, but this one has been around for a very long time (Ray has it on his website now, I noticed). So I carefully tarted up my new handle, stuck it on, & took a test drive. Another revelation – this handle felt just right when crosscutting on my bench hook. A quick comparison with my other saws shows the difference – the grip on this one makes an angle of about 52 degrees with the line of the teeth – much more “kicked up” than the other saws mentioned, and keeps my wrist at a very comfortable angle when my forearm is angled down toward the bench, as it is in this operation. This was also the tipping point in my saw making career – Ray saw it when I put it up on a bulletin-board, and encouraged me to make a saw from scratch. He even most generously provided me with a good-sized chunk of saw plate – thanks Ray, but you don’t know what you started!
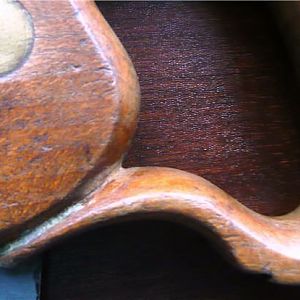
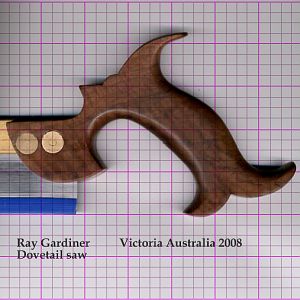
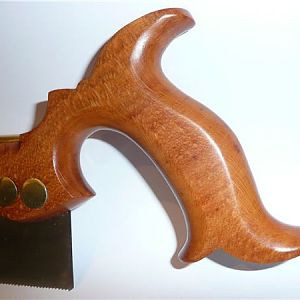
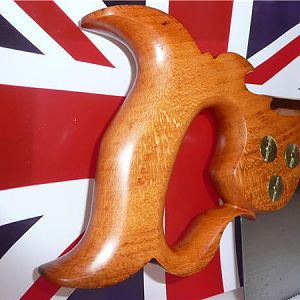
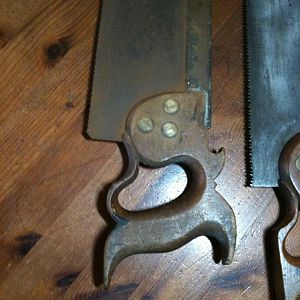
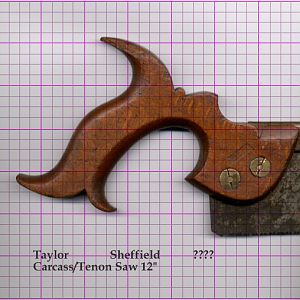
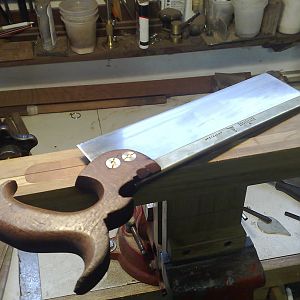
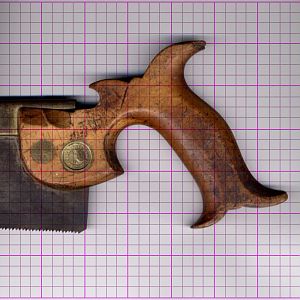
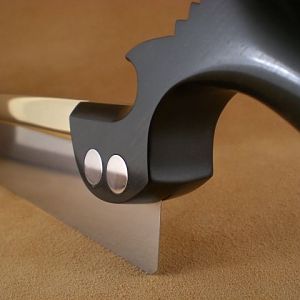
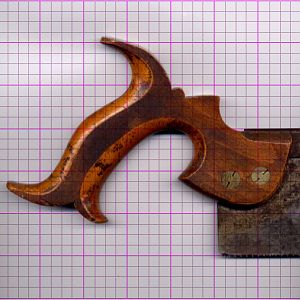
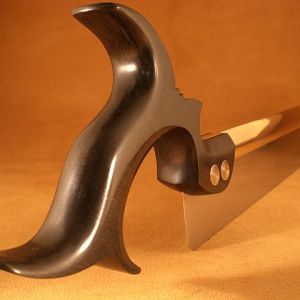
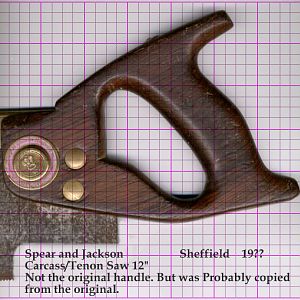
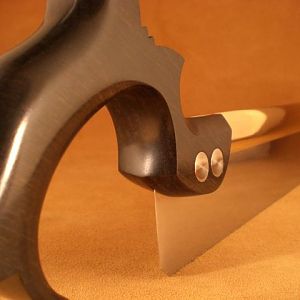
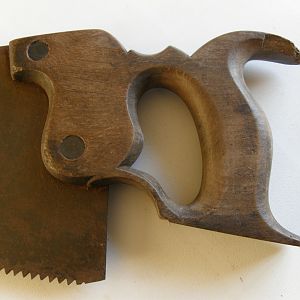
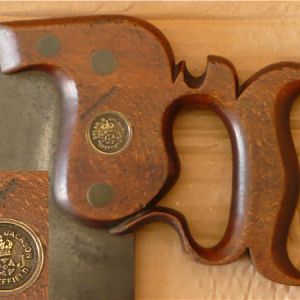
So my conclusion is, grips at different angles suit different operations – hardly rocket science, but I simply hadn’t thought much about it til then. I do most sawing with my forearm either parallel to the bench, in which case a grip that makes an angle of about 60-65 degrees to the tooth line is ideal for me, or with my forearm angled down to the bench surface, in which case a grip angled about 50-55 degrees to the tooth line works best. Doesn’t seem like a lot, but it makes a big difference to comfort. And here I can throw a match into the debate about canted blades– one effect of this is that when the handle is fitted with the fillets parallel to the back, as is usual, it throws the grip up slightly, giving it more clearance when used on a bench hook, as I found when I made my own copy of the Kenyon saw that was being touted around a while ago. But even larger saws, which have plenty of handle clearance, were canted, so I don’t seriously think there was a reason other than fashion.
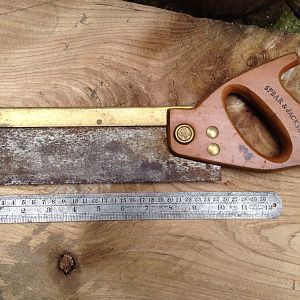
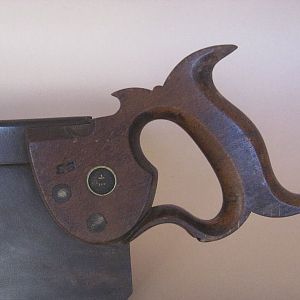
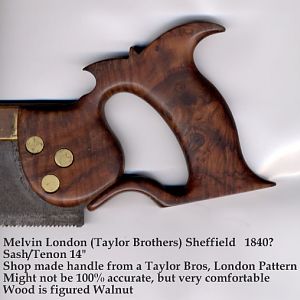
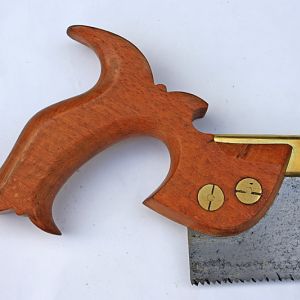
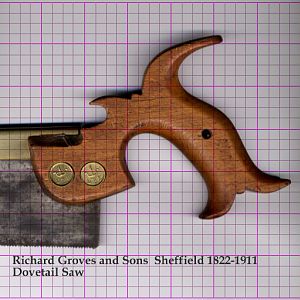
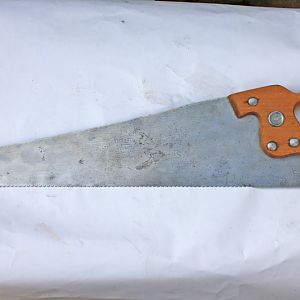
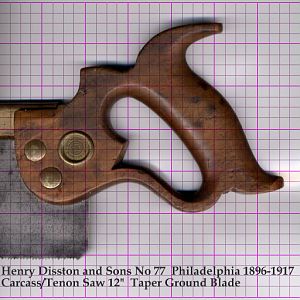
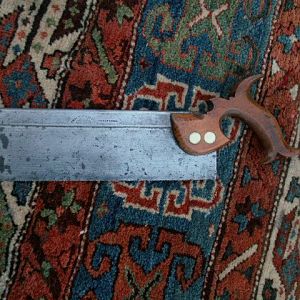
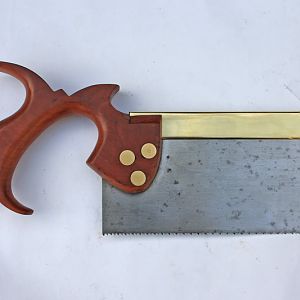
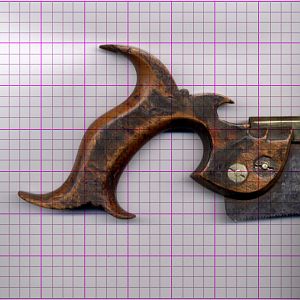
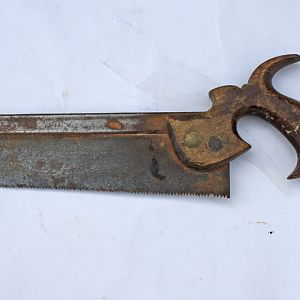
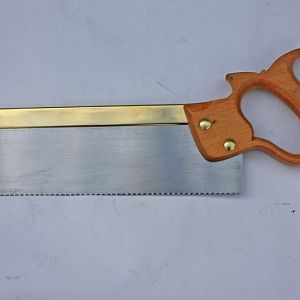
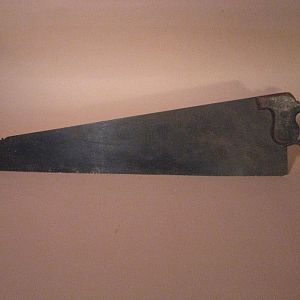
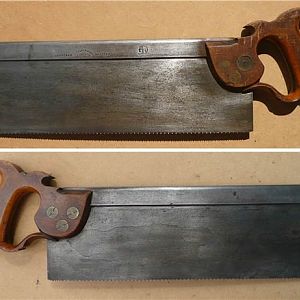
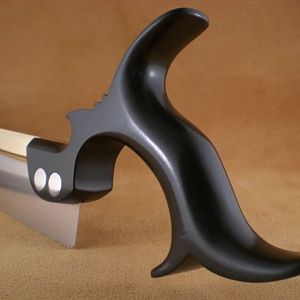
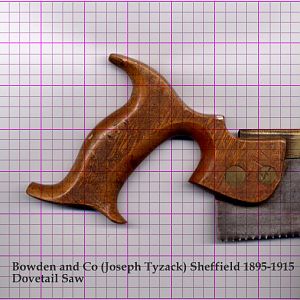
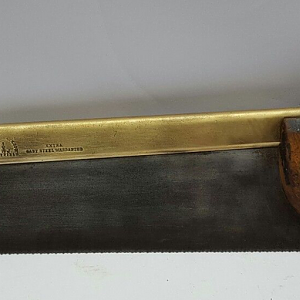
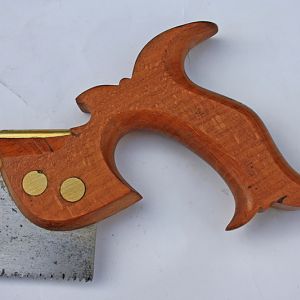
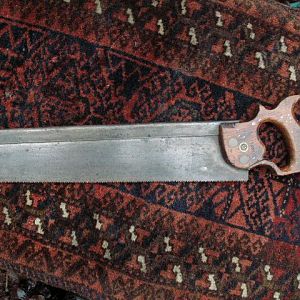
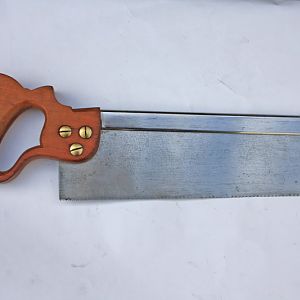
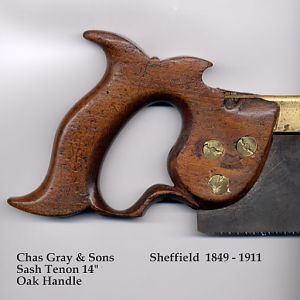
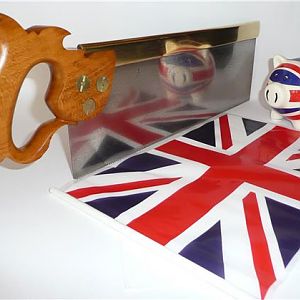
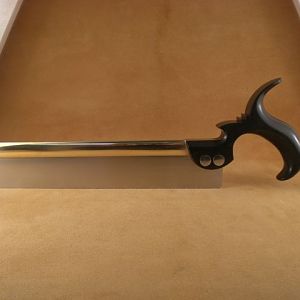
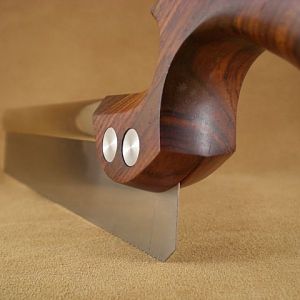
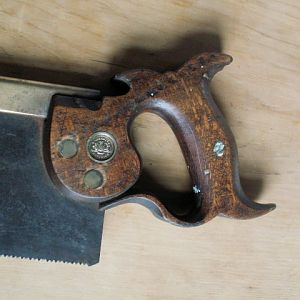
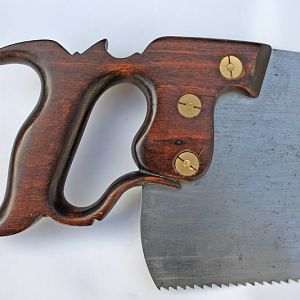
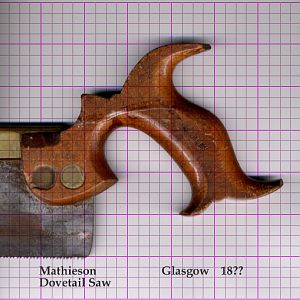
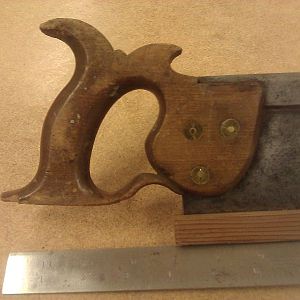
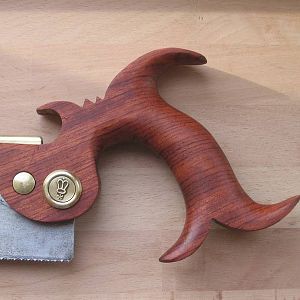
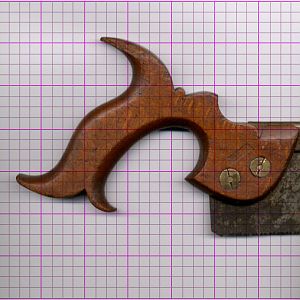
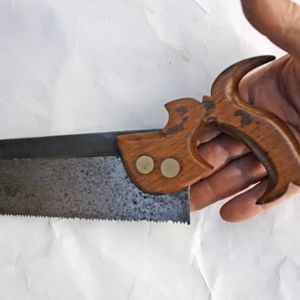
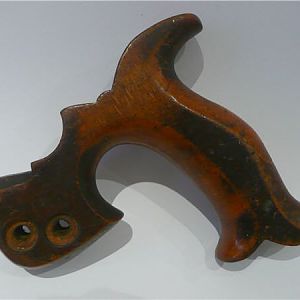
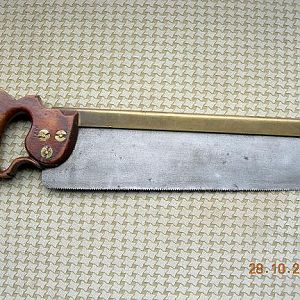
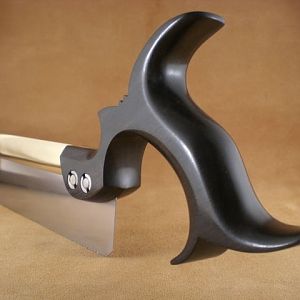
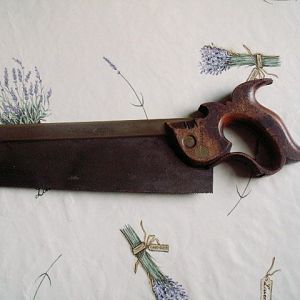
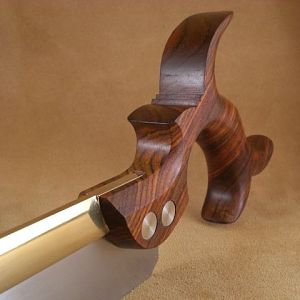
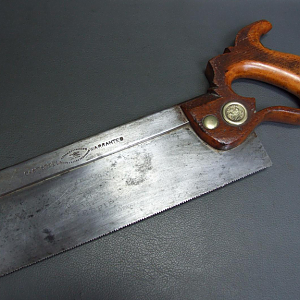
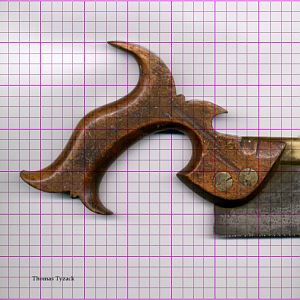
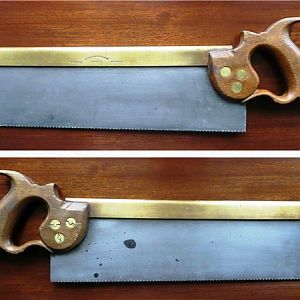
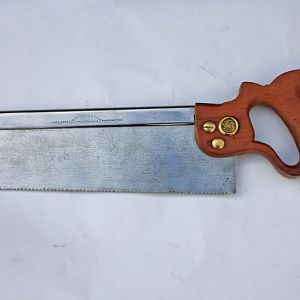
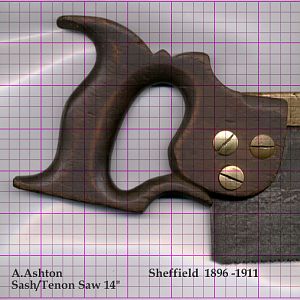
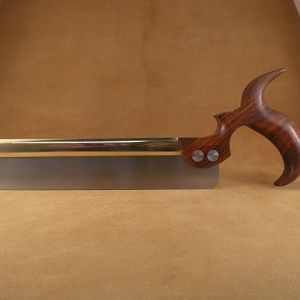
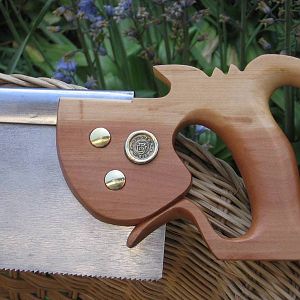
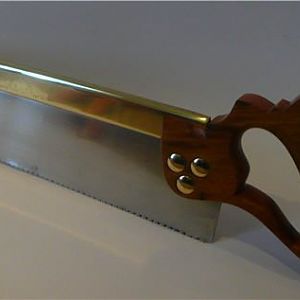
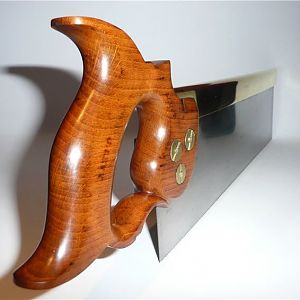
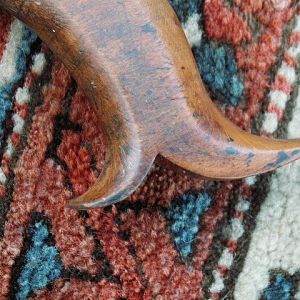
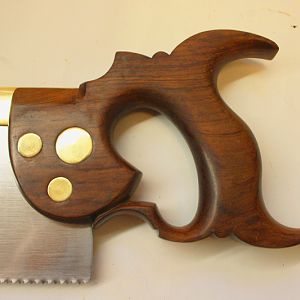
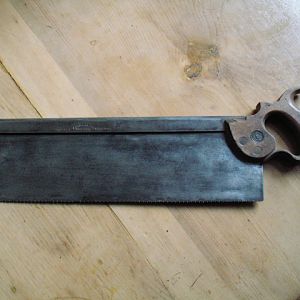
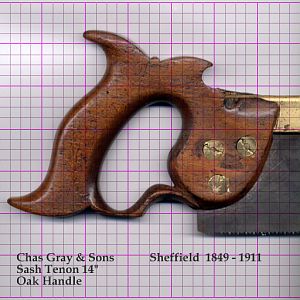
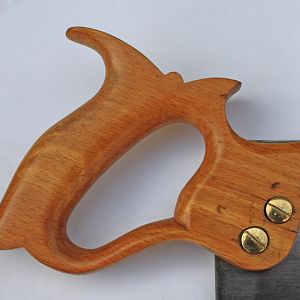
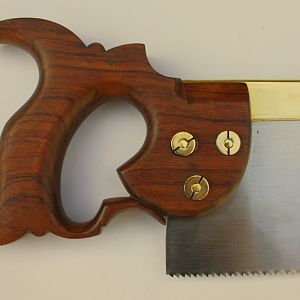
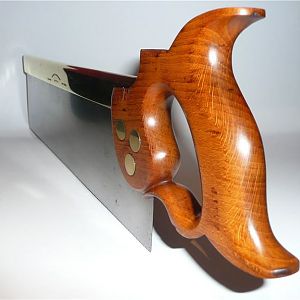
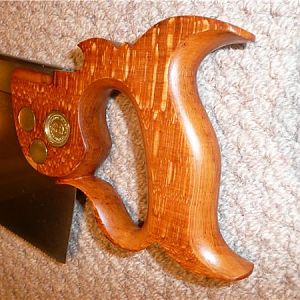
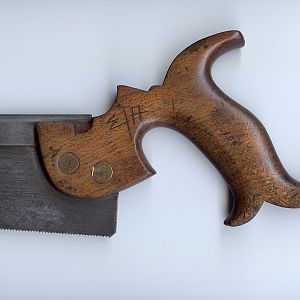
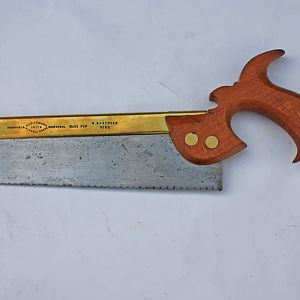
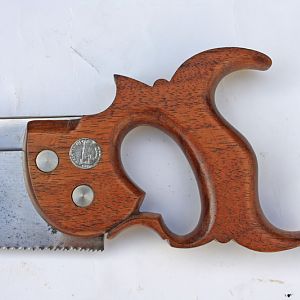
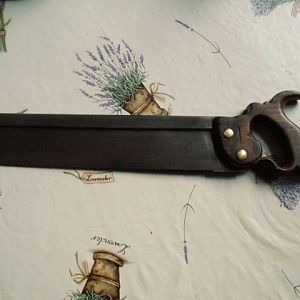
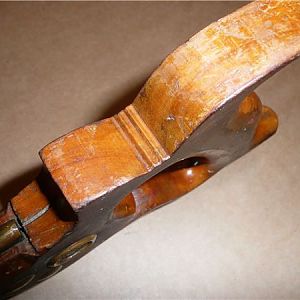
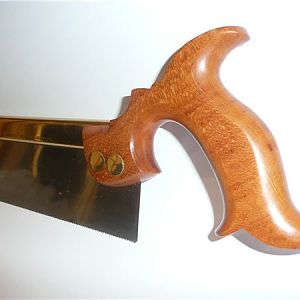
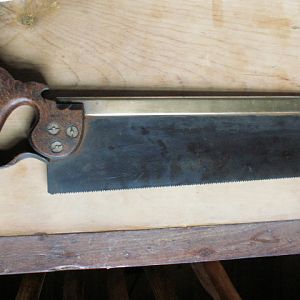
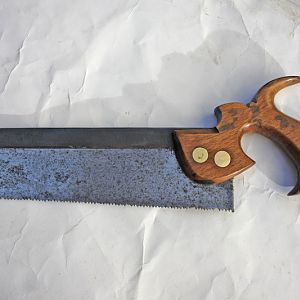
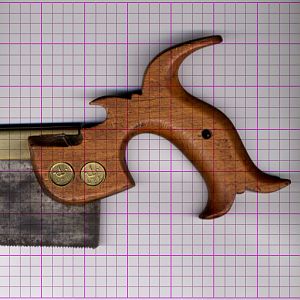
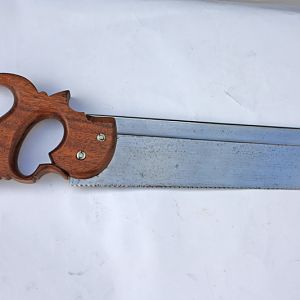
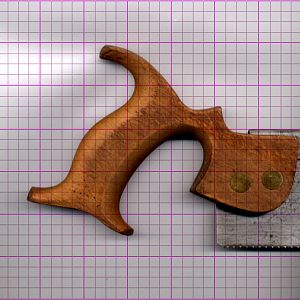
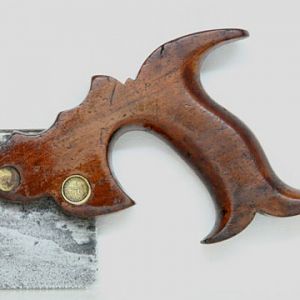
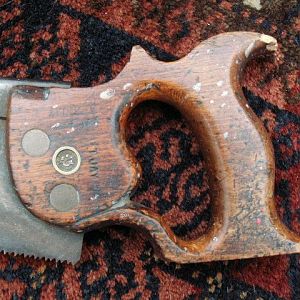
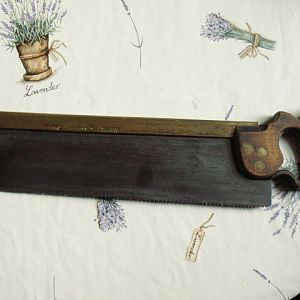
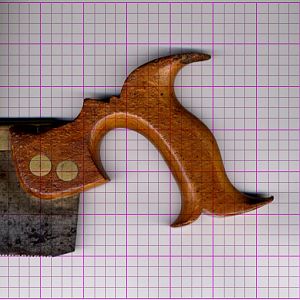
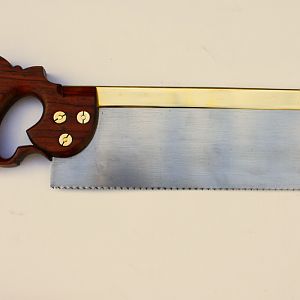
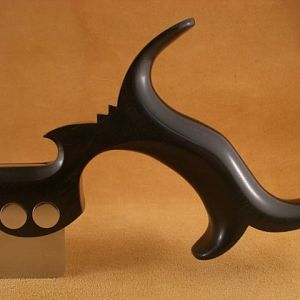
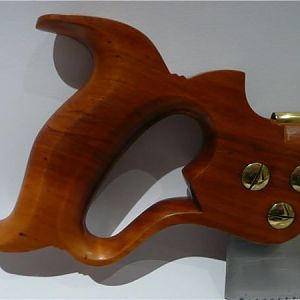
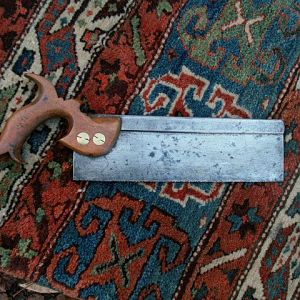
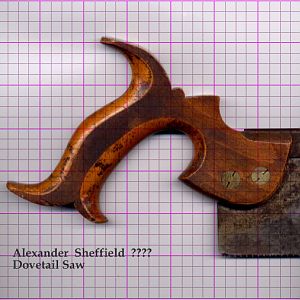
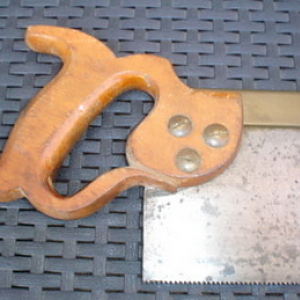
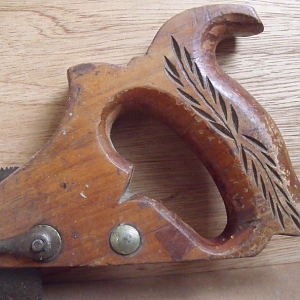
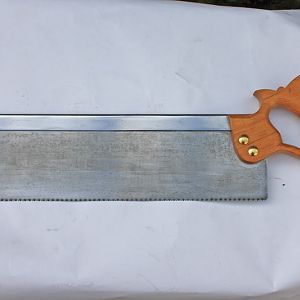
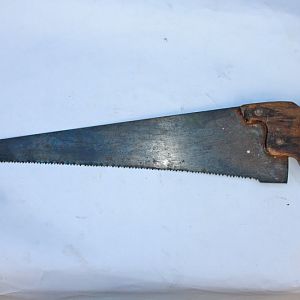
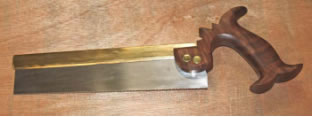 Fig 3. 220mm “Kenyon” style saw, 15tpi, with canted back. The grip makes an angle of 55 degrees with the tooth line, and is a good compromise for cutting at a range of arm heights. It projects slightly below the tooth line, but is ok for most cutting operations on a bench hook.
Now, onto more complicated and fraught issues – the tooth pitch and their preferred profiles. There is really no ‘right’ answer to these questions, of course – witness the endless variety you find in old backsaws. Skilled saw sharpeners like my old dad had no compunction in recutting & re-shaping teeth to make a saw more fit for some purpose, so I’ll bet it was a fairly common practice way back...
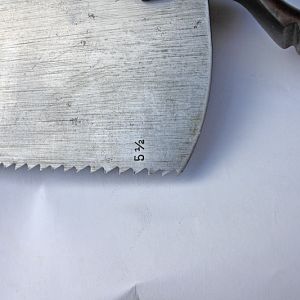
Now I was taught by my manual-training teacher at school that you should have a minimum of 4 to 5 teeth in the cut. I’ve seen other recommendations, but they are all pretty similar, and the idea is to have enough teeth resting on substrate that they don’t bite too hard & jam, or worse, rip the top off a tooth. As in just about every facet of life, the ideal is rarely attainable & we generally have more teeth than that in a cut, which means waste clearance & cutting is less efficient than it could be. In the sort of general joinery I do, & the typical width of saw cuts, I have found 12 & 15 tpi to be the most useful pitches for small saws. Until a few years ago, I tended to go for finer teeth, but now that I’m a much better sharpener, I realise that my preference for finer teeth was because my terrible sharpening didn’t create as much variation in tooth heights, which gave the illusion of smoother cuts. But now I can sharpen a saw so that the teeth are very much closer to even, I find a coarser pitch can cut just as smoothly, and much more quickly in most situations. The thinnest sections I would normally cut would be small drawer sides, at around 10mm, so that a 15tpi saw will have at least 6 or 7 teeth in the cut. Thicker pieces will support many more teeth, so to cut something over about 30mm wide, I would pick up one of my bigger 12tpi carcase saws. Although it would cut a wider kerf, it will cut more quickly and accurately in the longer cut.
Tooth profiles I’ve left to last. Here I found a bit of a surprise when I mucked about with a few different angles. I started out adhering to the recommended rake angles for crosscut & rip, but over time have come round to putting 5 degrees of rake on both. This makes ripsaws easier to start & smoother cutting, and gives crosscuts a bit more ‘bite’ so that they can be used for shallow ripping. I don’t find it makes the crosscuts any less smooth in their cutting action – as long as I give them about 15 to maybe 20 degrees of fleam, they seem to cut cleanly. With only one rake angle to set up & maintain I seem to be able to be more consistent, which is important for someone who doesn’t file saws every day.
So those are my thoughts after 50 years of wielding saws, but only a short time really thinking seriously about what they do. They are, naturally, a reflection of the types of woods & cuts I make with my backsaws (more traditional cabinet woods, not the really hard stuff). I haven’t tried to fool around with any larger handsaws just yet – for now I’m content to follow the profiles they came with.
And one last observation – for those whose eyesight is as chronologically challenged as mine, one of those 5x headband magnifiers is a godsend – it’s a bit of a nuisance having your snout so close to the action, but it’s so good to be able to see clearly what’s happening to those little teeth as you file!
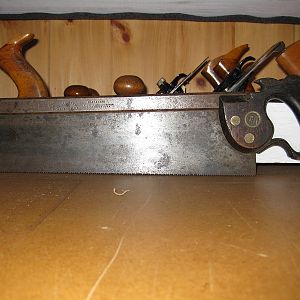
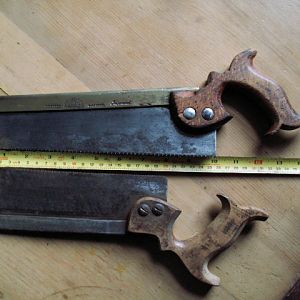
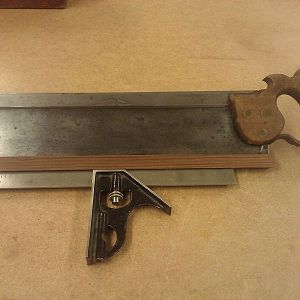
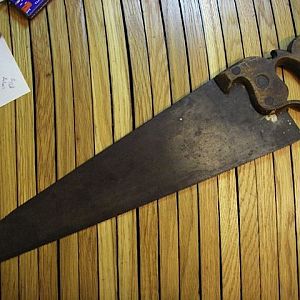
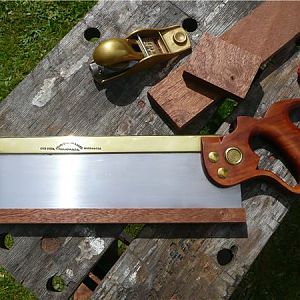
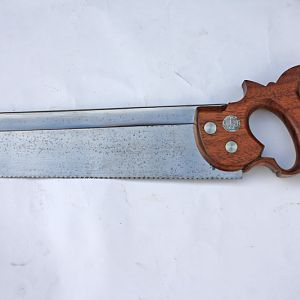
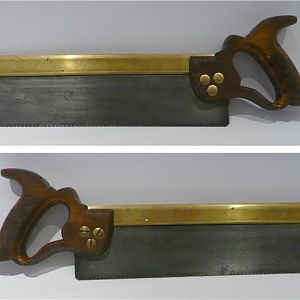
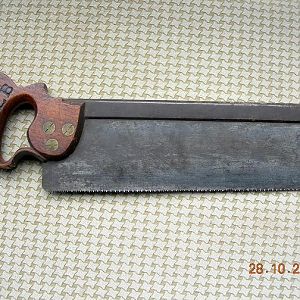
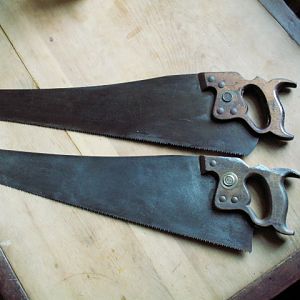
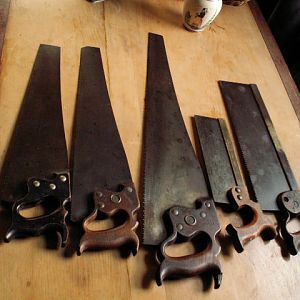
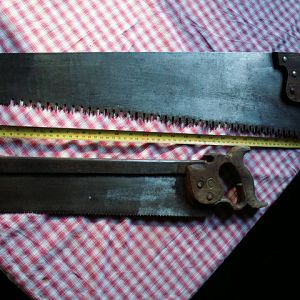
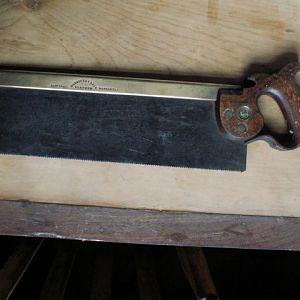
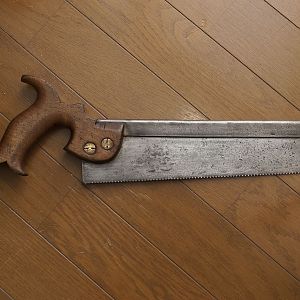
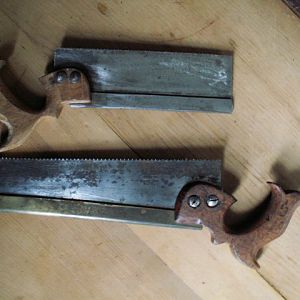
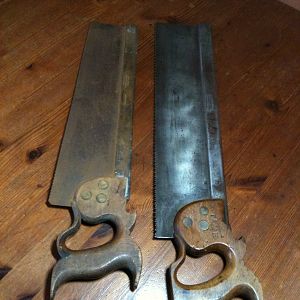
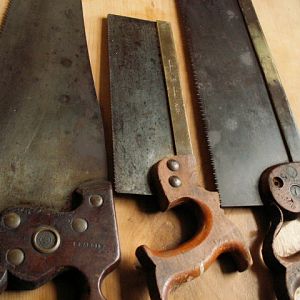
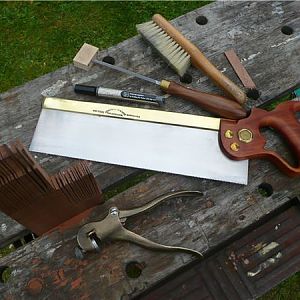
For the record, here is my current stable of backsaws. All bar one recently made, but replacing similar saws, so although I haven’t had most of these saws more than 6 months, I have used the same lineup for some years now. With this lot, I rarely wish for anything more – they do everything I require very well.

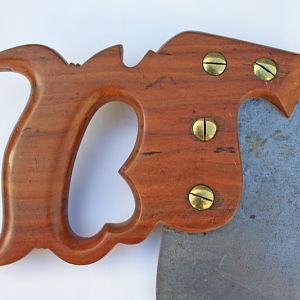
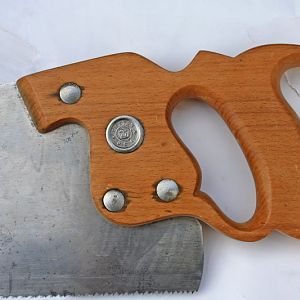
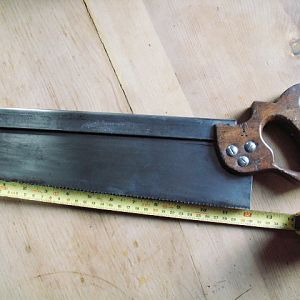
Fig. 4. From top to bottom:
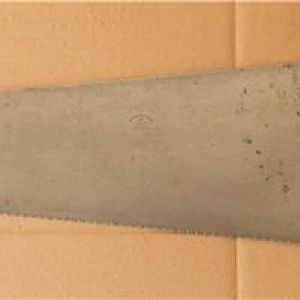
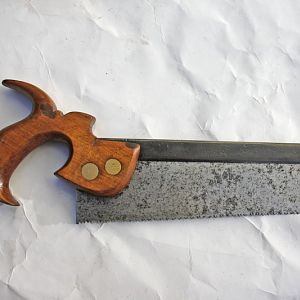
1. A 300mm 12 tpi rip, from 0.5mm plate. A fast-cutting saw with a very fine kerf & a bit of an enthusiast’s tool as it takes some practice to control due to the minimal set.
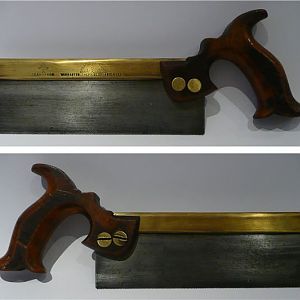
2. My most recently-made D9 style, 310mm, 12 tpi xcut. This is made from 0.75mm plate, and has the first 25mm from the toe filed at ~15tpi – easy to start & cuts nicely.
3. A very comfy 250mm 15tpi xcut. This has the 52 degree “compromise” handle that makes it a very good little all-rounder.
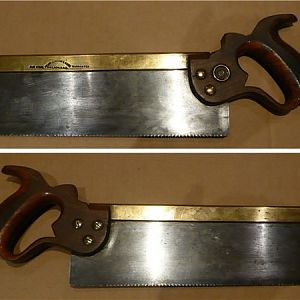
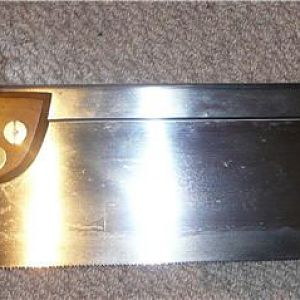
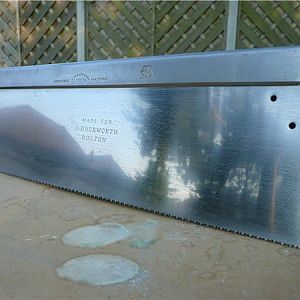
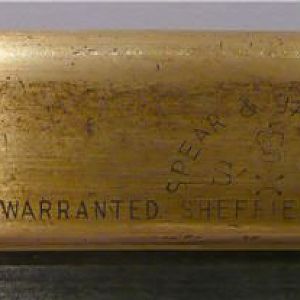
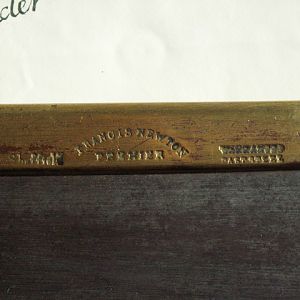
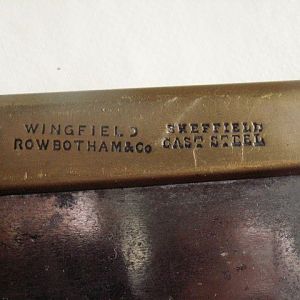
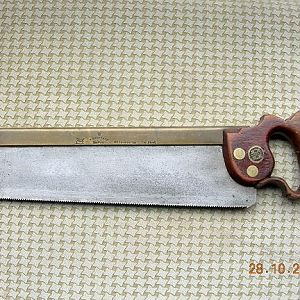
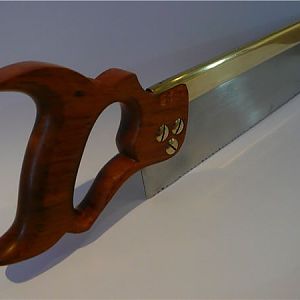
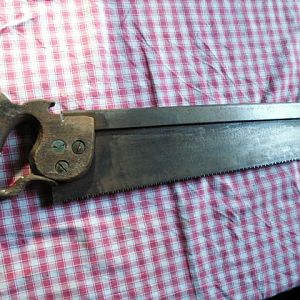
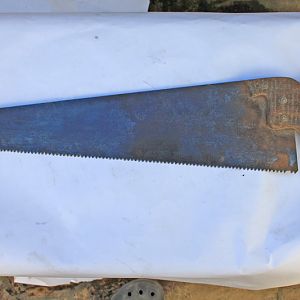
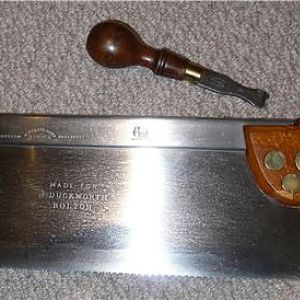
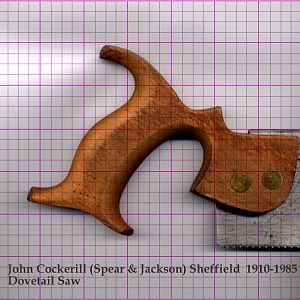
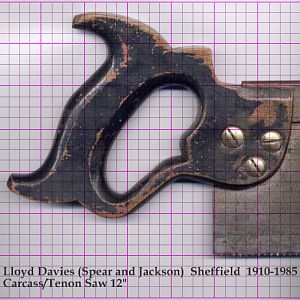
4. The oldest & only commercial saw left – a 200mm, 15tpi rip. Formerly my ‘favourite’ dovetailer, but rapidly being squeezed out by the next saw....
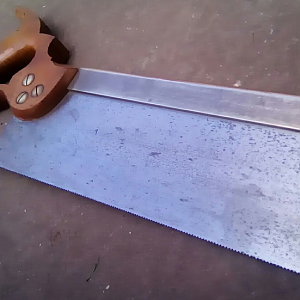
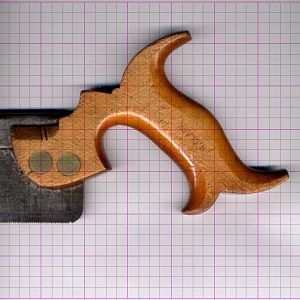
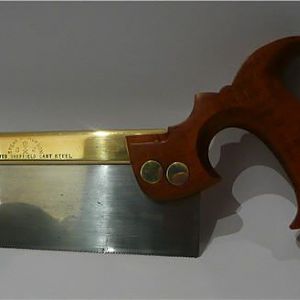
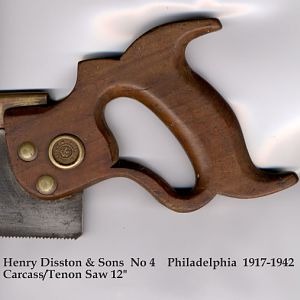
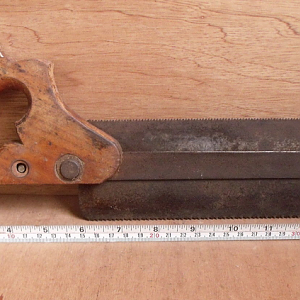
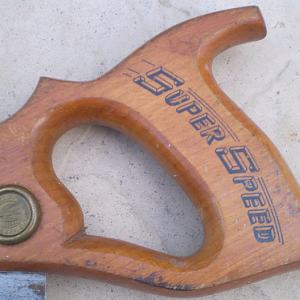
5. This is a little beauty! My “Kenyon” style, 15tpi “semi-xcut” which crosscuts & rips thin stock with equal facility. The 55 degree grip is a very comfortable compromise for most bench work.
6. A somewhat whimsical 150mm 18tpi xcut – handy for small jobs like nipping off an end on lathe work or anywhere where a fine, slow cut is called for.
IanW June 2009